With Christmas just around the corner (sooner for those of us that are celebrating early) I figure I need to find some quick & easy projects I can get done for the large list I always seem to have!
One project I have found fun & easy to do is fleece scarves. One year I lucked out & bought a ton of fleece on sale, made my nieces quillows & matching scarves. I didn't have my serger at the time, but I had my rotary pinker, cutting mat & ruller! Everything came out great & the girls still use them.
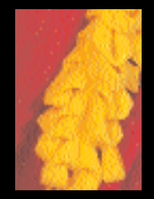
This year I found a fleece project for a "Twist Boa" This boa is fast to make - fold, stitch, cut and twist.

Materials: makes 3
• 1 2/3 yds. outerwear fleece
• matching thread
• marking pencil, chalk
• OPTIONAL: rotary cutter, mat, ruler
Cut:
• (3) 18" X 60" pieces fleece
NOTE: 60" length is parallel to selvage edge
and 18" is greatest degree of stretch.
Directions: for each Boa
1. Using a marking pencil, mark a line 6" from each long edge on the wrong side.
2. Bring top line down to meet the other, folding fleece wrong sides together.
3. Bring raw edge to fold, making a second fold over the first.
4. Using a wide, medium length zigzag, stitch over fold and raw edge from steps 2 and 3.
5. Wrong sides together, fold fleece so remaining long raw edge just covers stitching from step 4. Zigzag over this edge through all layers.
6. On each section, make 3/4" wide cuts about 21/2" deep forming loops. NOTE: Cuts should end approximately 1/8" - 1/4" from stitching.
7. Twist the end of each loop to bring the inside to the outside. Taking care not to stretch loops too much.
6. On each section, make 3/4" wide cuts about 21/2" deep forming loops. NOTE: Cuts should end approximately 1/8" - 1/4" from stitching.
7. Twist the end of each loop to bring the inside to the outside. Taking care not to stretch loops too much.
0 Fantastic people left feedback!:
Post a Comment